Chapter 1: Installation and First Launch
Continuing from Chapter 0 — What is Brainstorm?.
This chapter gets Brainstorm open on your screen for the first time.
Two ways to install it
- As a plugin inside MATLAB. If you already have MATLAB, Brainstorm is a set of
.mfiles you download and add to MATLAB's path, then launch by typingbrainstormat the MATLAB command prompt. - As a standalone application. Brainstorm also ships a compiled version bundled with the free MATLAB Runtime, so you can run it with no MATLAB license at all — download the installer for your operating system (Windows, macOS, or Linux are all supported), run it, and launch the resulting application directly.
Both routes end up at the exact same interface described in this chapter — the standalone version is simply the no-license option.
First launch: choosing a database folder
The first time Brainstorm opens, it asks you to pick (or create) a folder on disk that will hold its database — every recording you import and every result you compute will eventually live somewhere inside this folder, organized automatically (the organization scheme is the subject of Chapter 2). Pick any empty folder with enough disk space; you can point Brainstorm at a different database folder later if you need to.
A first look at the window
Once it's open, the main window is divided into three regions you'll return to constantly:
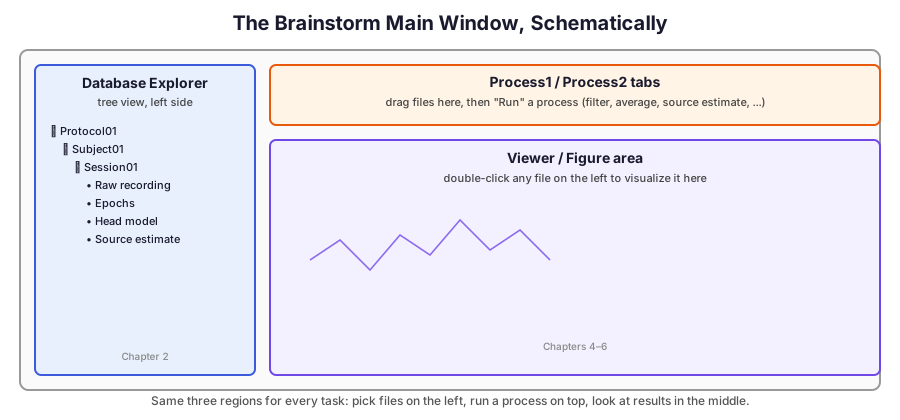
- Database Explorer (left) — a tree view of everything in your database: protocols, subjects, recordings, and every result computed from them.
- Process1 / Process2 tabs (top right) — where you run operations. You drag files from the tree into one of these tabs, pick a process from a searchable list (filtering, epoching, source estimation — hundreds of options), set its parameters in a dialog, and click Run.
- Viewer (main area) — double-click almost any file in the tree and it opens here: a time series, a scalp topography, a 3D cortex, whatever that file represents.
That's the whole interaction model for the rest of this track: select files on the left, run a process on top, look at the result in the middle.